Thursday, July 15, 2010


SCANography!!


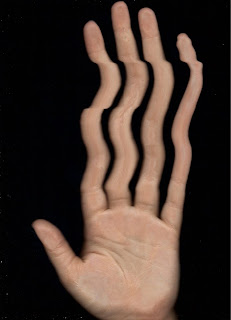
This scan is just my hand in one scan, but because the light moves slowly, I was able to move with it so it looks like I have really long fingers.
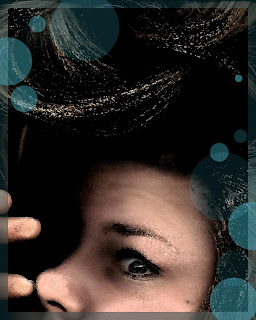
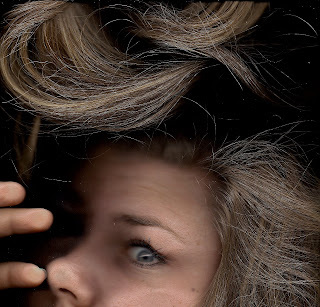
This was one of my first scans.  I just thought it was a funny picture so I decided to put a filter on it before I made the border.  I used a watercolor filter to make it look like I am underwater and then made a stroke for the border and created shapes to put in the opposite corners at different opacities.  I think it turned out to be a funny picture.


Tuesday, June 22, 2010

Photollusion Straight

Photollusion Blend


These photos were so fun to do!  I loved it!  The first I got a little help with my roommates.  It is just hilarious.  Then the second photo I had my friends help me and pose for me.  I just used the quick selection tool to take the hand and my friend out of their photos and into the photo with the cereal.  I really like how they turned out. 

Headless Pic: Canon PowerShot SD750, 6/21/2010-8:01 pm, Shutter Speed-1/60 sec, F-stop-/2.8, focal length-5.8, ISO-200, No flash.

Little cereal girl: Canon PowerShot SD750, 6/21/2010-10:50 PM, Shutter Speed-1/60 sec, F-stop-/2.8, focal length-5.8, ISO-200, flash fired w/ red-eye reduction.
Template 


I took this photo when I was taking photos for my other photography class.   I wasn't even planning on using it in this class but I just really liked the shot. My friends and I went back past the temple on a drive by all of the potato cellars and I was just taking pictures while we were driving and this was one of them.  I changed the tone of the picture to a warmer tone in photoshop.

Road pic- Canon PowerShot SD750, 6/7/2010-8:24 PM, Shutter Speed-1/60 sec, F-stop-/2.8, focal length-5.8, ISO-160, No flash.

Tuesday, June 15, 2010

Border Effects

Kayla :)


Dunes


The first picture is of my friend Kayla.  I took the picture in black and white.  I added the border with the marque tool.  I selected the rectangle that I wanted on the inside and then selected the inverse and then painted over it with the paint brush of an opacity of about 50 in black.  The second picture I took at the sand dunes. I had time while we were waiting to get the car out. When we parked we got stuck so we were all just standing around and switching off pushing the car. It was funny, but I got this shot of the sky and it was really pretty. 
Light Effects

"L" is for Lishelle


Cell Phone Blur
Heart


Creeeeeeepy Kayla

I had my friends Garrick and Kayla come help me make these pretty fun light effects. They were great sports. It is fun to capture the light. One reason that I loved this was because you never know what it is going to turn out to be until you look at the photo. all you can see is black, then it shows up on the screen. It was really fun!

Thursday, June 10, 2010


Photobook Template

I took the first one and changed it a bit in photoshop.  I couldn't start from scratch.  It was easier to change rather than invent.  I think the reason that is, is because I don't know how to do everything that I want to do with this just yet.  But I like how this one turned out.

Tuesday, June 8, 2010


A Picture a Day!!

Tuesday
Kelsey Twirls

Wednesday
Roomie Toes
Thursday
Classic Taylor Shot
Friday
Ceramics
Saturday
Dunes Fire
Sunday
Monday
Monday Drive


Tuesday, June 1, 2010


The first two shots I took this morning of my cousin. She is a dance major here at BYUI and she has dance classes 24/7 so this is really her environment. I changed these shots to black and white because it brought a lot more to the shot. I really like how they turned out. The third shot is of my brother. It is a group and an environment photo. He is on the high school base ball team and because I was home I could take this shot. I really liked how it turned out. It definitely was a candid shot. I just played around with the levels and vibrance of this photo for the editing.

Portraits

In this picture I airbrushed her skin for my tutorial so I used it as an enhanced edited portrait for this week also.


In this photo I also did some enhancements. I made her Eyes a lot more blue with the saturation and then i used the paint brush to take it away from the parts of the photo that I didn't want it to be on.


This was my color edit. I actually learned how to do this right before I found out that we were supposed to do this for the assignment. For once I felt a little ahead of the game. I really like doing this now that I know how.

I did some portraits of my roommates and most of the editing was with the levels, curves, and saturation. I also added burnt edges to each one of these portraits.
Add Image

Tuesday, May 25, 2010


HDR

I must have done something wrong in this process. I couldn't figure out how to save the three shot photo. I am still trying but I got the single shot HDR saved. I think that I just want to buy the program because I really like what it can do.
Macro/Photo Blend


I think blending is my favorite thing to do in photoshop. I am so glad that we learned how to use adjustment tools and all of the blending options. It is so crazy all of the things that you can do. I did the same thing that I do with all of my photos that I did on these two shots. I changed the brightness with the levels and curves tools. Then I burnt the edges. I also added a solid color blend to one of these shots and used the paintbrush tool also.


Reverse Shallow Depth

Haunted House

No Trespassing

I really liked this stop. I wish that there wasn't a no trespassing sign on the fence because I really wanted to get a closer look at this building. It looked so fun. But I liked these two shots and how they turned out. The only editing that I did was with the levels and curves and a little burning.